Showing posts with label Artsy Fartsy. Show all posts

Wednesday, January 25, 2012

Art Class 2011


This was a Ink Wash I had to do. I choose a
Georgia O'Keefe painting as my inspiration and used sea shells my boys collected from a trip we took to Myrtle Beach two years ago.


These four pictures were my Final Project for the class. I choose Interiors as my subject and Charcoal as my medium. I was blessed as a great friend of ours allowed me to use their house as my interior.


This was my first interior I attempted in class.


The class was very intense and demanding but I learned a lot, as it was my first classical drawing class. I was challenge by the teacher constantly, not always in a positive way, but it led me to improving with each day. I was so glad to have taken this class. I have more portraits but they are figure drawings of nude models so I will just keep them to myself. I would not want to post them without the approval of the models so they will just have to stay in my portfolio. I am really hoping to move on to painting next semester. We will see how things go.


Friday, May 20, 2011

Artistically Inspired Once Again

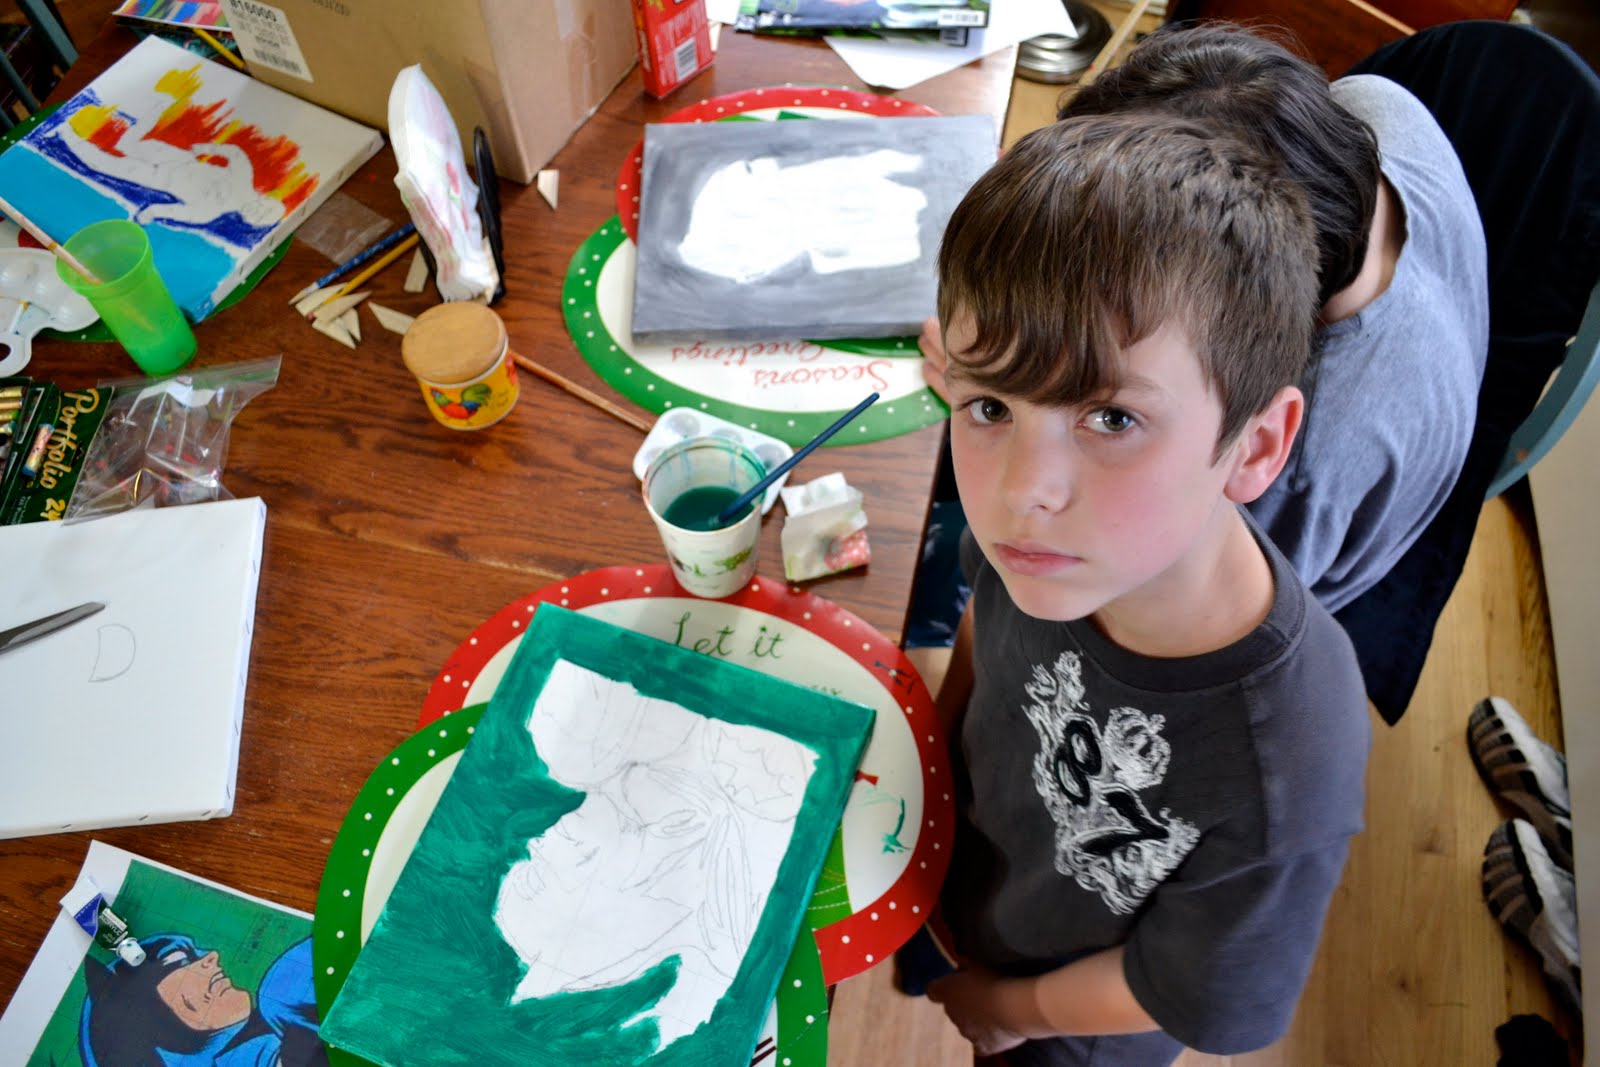
After a period of no creativity I got inspired to work with the boys with
art again. We are creating a Superhero Wall Mural with canvas's.
Shaggy is tackling Green Lantern.

Drama King is working on Batman, but of course!
And Rocker has Flash because he says he is like the Flash.

We were given a whole pile of comic books, some of them not really appropriate. So instead of just throwing them all away we are going to rip them up to make a comic book page mosaic. The boys worked on the blocking in of their pictures yesterday and filling in the backgrounds. This weekend we will start the mosaic. It was fun to see them get excited about it. I will be working on Superman since this is project going in their bedroom. They didn't want me to work on Wonder Woman! :-)

Tuesday, January 19, 2010

DK's Turn With Legos


Each of the boys wanted a chance to develop and film their own Lego Stop Motion Animation. This is DK's video. I just assisted with the Computer end and some of the pictures. He came up with the story line and told me how to edit. It was fun. More to come....

Monday, January 18, 2010

What To Do On A Rainy Sunday...

You make a Lego Stop Animation Film!!!! It's our first time so I hope you enjoy. I now have a small Lego Stop Animation Studio in my dinning room. I love creativity!!

Monday, August 24, 2009

A New Found Treasure


Last Thursday my dear friend Natalie sent me an email letting me
know that her husbands parents had a small loom in their garage
they were trying to find a home for. My heart started to pound with
excitement. I talked to my husband about taking the loom and to my
hearts joy he said yes. So Friday Natalie and her In-Laws dropped
the newly found treasure off. Here it is.

It needs some TLC but my Knight and I have been busily
repairing it. My Knight had to grind down some of the metal
parts that were rusting and I have placed an order for some
replacement parts already. The best thing is the history behind this treasure.


This was made by a relative of Natalie's on her husbands side. A man
named George W. Martin. I so wished I had met him. He hand made this
lovely creation. My Knight and I were fascinated by his workmanship
and ingenuity as we unpacked the pieces and put it together. The man
was a a genius. Each part painstakingly hand made for Kent University
of Ohio. This particular loom was made in a batch of looms to be delivered
to their Arts Department. Some how this one did not make it. I am ever
so grateful it did not. :)

Here it is some what set up. Again we are still working on restoring
some of the parts and waiting on some replacement parts. I can't tell you
how much this loom means to me. It may stay at our home or travel
some where else but it takes me back to my childhood. The thrill
and excitement of learning to weave on my first 4 harness loom.
It has reignited my passion for weaving and brought me
back to the reason I first fell in love with it. I feel like a kid.
This loom is beautiful in design and history. I hope that many a young
person will learn to weave using this amazing piece of work. I hope
to be honored to have the ability to teach many of those young people with
this loom.


I know, just something so simple and old brings me such joy.
I have fallen in love with this treasure. I will post later about
it's development and where it travels to later.

Monday, July 27, 2009

Prayer Center Pillows


I felt a little like Maria on The Sound of Music except my curtains
were being turned into pillow covers instead of childrens clothes.
Any way I had a fun time taking the curtains they are hanging
in our new/updated prayer center at church and making pillow
covers for them. I found myself singing praise songs the entire
time I was cutting and sewing. They turned out soooo good.


Here they are. If you get a chance to get up to the Prayer Center you
should see it, it is amazing. This was my humble contribution and creations.
I had to laugh at the way the Lord works. The Prayer Center is decorated and designed
to represent the Lords throne room with a beautiful mural of the 4 Living Creatures.
They took these gorgeous gold curtains and hung them across the one wall with all
the windows to enclose the room. They asked if I could make pillow
covers to match. When I went to find thread to match the curtain material
I found a perfect gold. As I looked
at the spool I noticed it was titled "Throne Room Gold". God loves details.
Anyhoo, they were fun to make.

Tuesday, February 10, 2009

Why Do I Do This To Myself Every Valentines?


Every year I tell myself I am just going to go and buy the
stupid valentines. Then I get some silly creative inspiration
and bada-bing bada-bang I am stuck in the middle of a
valentines craft frenzy. This year the boys and I saw these
cute valentines in FamilyFun Magazine.


The ipod-like valentines were suposed to be boxes of conversational
hearts wrapped in construction paper but after realizing
how much money it would cost to buy 48 boxes of them
I some how got the briliant idea to make my own boxes with
card stock. I really needed someone to give me a V-8 slap
on the forehead. What was I thinking in making 48 stupid
ipod-like boxes. Uhhhgg! So Rocker & DK & I got to work.

So after I cut them out and then scored them so the boys
could fold them properly they put candy on the inside and
taped them up. We just downloaded the free templates
for the ipod-like face.

Thankfully Shaggy picked an easy one and could do it all by himself.
I am so glad he didn't want anything else. So what are you doing for valentines
for you kids? Do you have school parties to provide for or just making
some for your kids friends? Do you go all Martha Stewart like, like I do or
do or do you just buy the Hannah Montana, High School Musical pre-made
valentines? If you ever see me in the craft isles the week of
valentines slap me silly before I purchase anything please. Thank the Lord
next year with Shaggy in 5th I will only have to come up with
valentines for Rocker and DK. Apperently 5th grade is the year
you stop doing parties and stuff like that. Phew!!

Thursday, January 15, 2009

Update On The Jeans

I now have 30 pairs of jeans!! Yahooo! I just got
a call yesterday that more are on there way. 
As you can see I have a great variety of color. This will turn 
out even better with the color variations. I am sooooo
excited to start on this. I am finishing up another little funky
hat and then begin to plan out my warp.
The Lord has been downloading so much to me about this
project I am anxiously waiting to share with you all. But 
I need to finish it first.
So if you still have any jeans continue to send them
over. I can be a continued source of getting rid of 
your old jeans, jeans shirts, skirts, jackets. I plan on 
making some cool denim rugs too.
Thanks so much everyone for your help. Soon I will
get to share with you the significance of your participation!!!
For other projects I have been working on go to GlamourHippie.

Thursday, July 3, 2008

Finished Projects!

The boys wanted me to show off their finished projects before we head out on vacation. We completed them today so here they are...
Shaggy's Camo, tank applique pillow. He even
stuffed and sewed it himself.


Rockers Christmas door sign. He did a great job with
learning basic embroidery and using the
sewing machine. Awesome Job Boys!!! You
make your mama proud!!!!

Monday, March 10, 2008

A New Look for Easter Eggs

I can never just dye Easter eggs. We have tied dyed them, painted them, and made felt ones but never just your traditional Easter eggs. This year we continued with our non-traditional Easter egg dying traditions. We decided to combine an old favorite with a new idea. We used stickers, pantyhose and leaves. Just to let you know ahead of time these were ideas taken from Family Fun Magazine.

Step 1: Collect your supplies. Dozen eggs, dye, leaves, pantyhose, Stickers.

When collecting leaves choose small pliable ones that will lay flat to the contour of the shell. Some of the leaves the boys picked were to crunchy and fell apart or they would not bend very well.


Step 2: Mix your egg coloring. I still use traditional egg dye by using food coloring. The boys enjoy making their own color creations. I like using this as a time to teach primary colors vs secondary colors and how each color is created. It also was a good time reinforcing counting with Drama King. He had to follow steps by dropping the correct amount of color in each cup.


3 Step: Take your eggs and pantyhose. Place you stickers on your eggs or grab some small leaves.Put your egg in the pantyhose and carefully arrange your leaves around the egg inside of the stocking. After they are in place tighten the stocking by twisting it up. You can go pretty tight without cracking your eggs.


Step 4: Pick your favorite color and dip the whole thing in, egg & stocking together. We did use a spoon to hold the egg down in the dye so our fingers would not change color too. Although some how I still managed to get dyed finger tips anyway. I should have followed HandsFree Hearts tip about gloves.:)


Step 5: After your egg has time to completely change into a beautiful green, blue, red or a multitude of colors just take it out, and dry it off. If you used stickers they will just peel right off and leave a stenciled look. When you are all done almost everything can just be thrown away and you have a rainbow of Easter eggs.

So go a head and break out of your "shell" this Easter. Be daring and try something new. Don't worry it doesn't have to look perfect it just has to be fun!!!

Note to TCC: Don't worry I am still working on your quote. Technically I have until 11 pm to post it.:) You really got me thinking on this one.

Wednesday, March 5, 2008

Wooden Trians, Planes & Automobiles

I don't typically endorse products but I thought this might be note worthy. Yesterday while I was at Michael's Craft Store looking for crafts for church Drama King and I found these cool little wooden kits. They come in all different vehicles. The best thing about it was they are only $1 each.

The Kit comes with everything you need to put your car, tank, plane, etc., together. GLUE, Paint, sandpaper, paint brush and instructions are all included. (Just a side note the paint in all three kits were kind of thick so we added some water and it worked great.)


I picked up three kits for my boys. Drama King was so excited we worked on
his all afternoon. He chose a tank. I helped a little bit making sure the right
side of the wooden pieces were glued properly, but for the most part he worked all by himself. He loved painting it and putting it together.


As you can see in the pictures I just laid down a garbage bag for
each of the boys to work on. Looking for craft projects for boys is
very hard so this was great.


Shaggy and Rocker came home from school
and finished their homework in record time. Then they jumped
right into their new projects. With Rocker and Shaggy I didn't
have to help at all they just worked quietly by themselves.

Rocker chose the race car.


Shaggy also loves tanks and army stuff so he picked the other tank. With his I added some of my own paints because he wanted more of a camouflage look.


And here are the final products. For $1 I will probably go back and pick up some more for another rainy day. I loved seeing them hard at work being creative and not asking for the TV or our old out of date Nintendo 64 (which we only own 2 games for it). It was so much fun. If you have boys who like to be creative, go to your local Michael's Store and see if you can pick these kits up. They are well worth it!!

Tuesday, February 19, 2008

Kids Arts & Crafts : Popsicle Stick Weaving


A little detour to the Arts & Crafts corner of my world. I will be posting fun ideas for families to inspire creativity here and there. Our house explodes with imagination and artistic expression ergo the post Creative Mess.

Toady is Kids Weaving 101: Adult supervision needed.

Supply List: Craft/Popsicle sticks
4 Large Sticks
11 Small Sticks
Glue (Heavy Duty Craft or Hot Glue Gun)
Yarn
21 Strands (2-3yards long)
Skein to weave with (the extra ball of yarn you will weave back & forth)

A) Take the small craft sticks and punch or drill holes in the center of each stick.

B) Glue the 11 small craft sticks onto 2 of the Larger ones creating a box shape. Leave plenty of space in between each stick.
C) Glue the last 2 remaining Large Craft Sticks to the exposed side of the smaller sticks. Now the front and back has the Large Sticks covering the ends.

D) As the picture shows thread each strand of yarn through a hole or slat. Example one through hole, next strand through slat and so on until each is threaded. Tie off each end.

E) With an extra piece of yarn tie one end to chair and one end to child. Have your son/daughter pull the yarn tight without pulling the chair over.

To Weave simply pull the loom towards you. Pull up or push down to create the path to weave your skien through. Alternate up and down as you weave. Pull back on the loom to push the woven yarn tightly in place.
Have fun and don't get frustrated. Weaving takes time and practice.

I also want to send a special thanks to my Drama King for modeling for my pics!!!! Mommy loves you kiddo. :)